Swift 알고리즘 및 언어공부
51. 푸드 파이트 대회
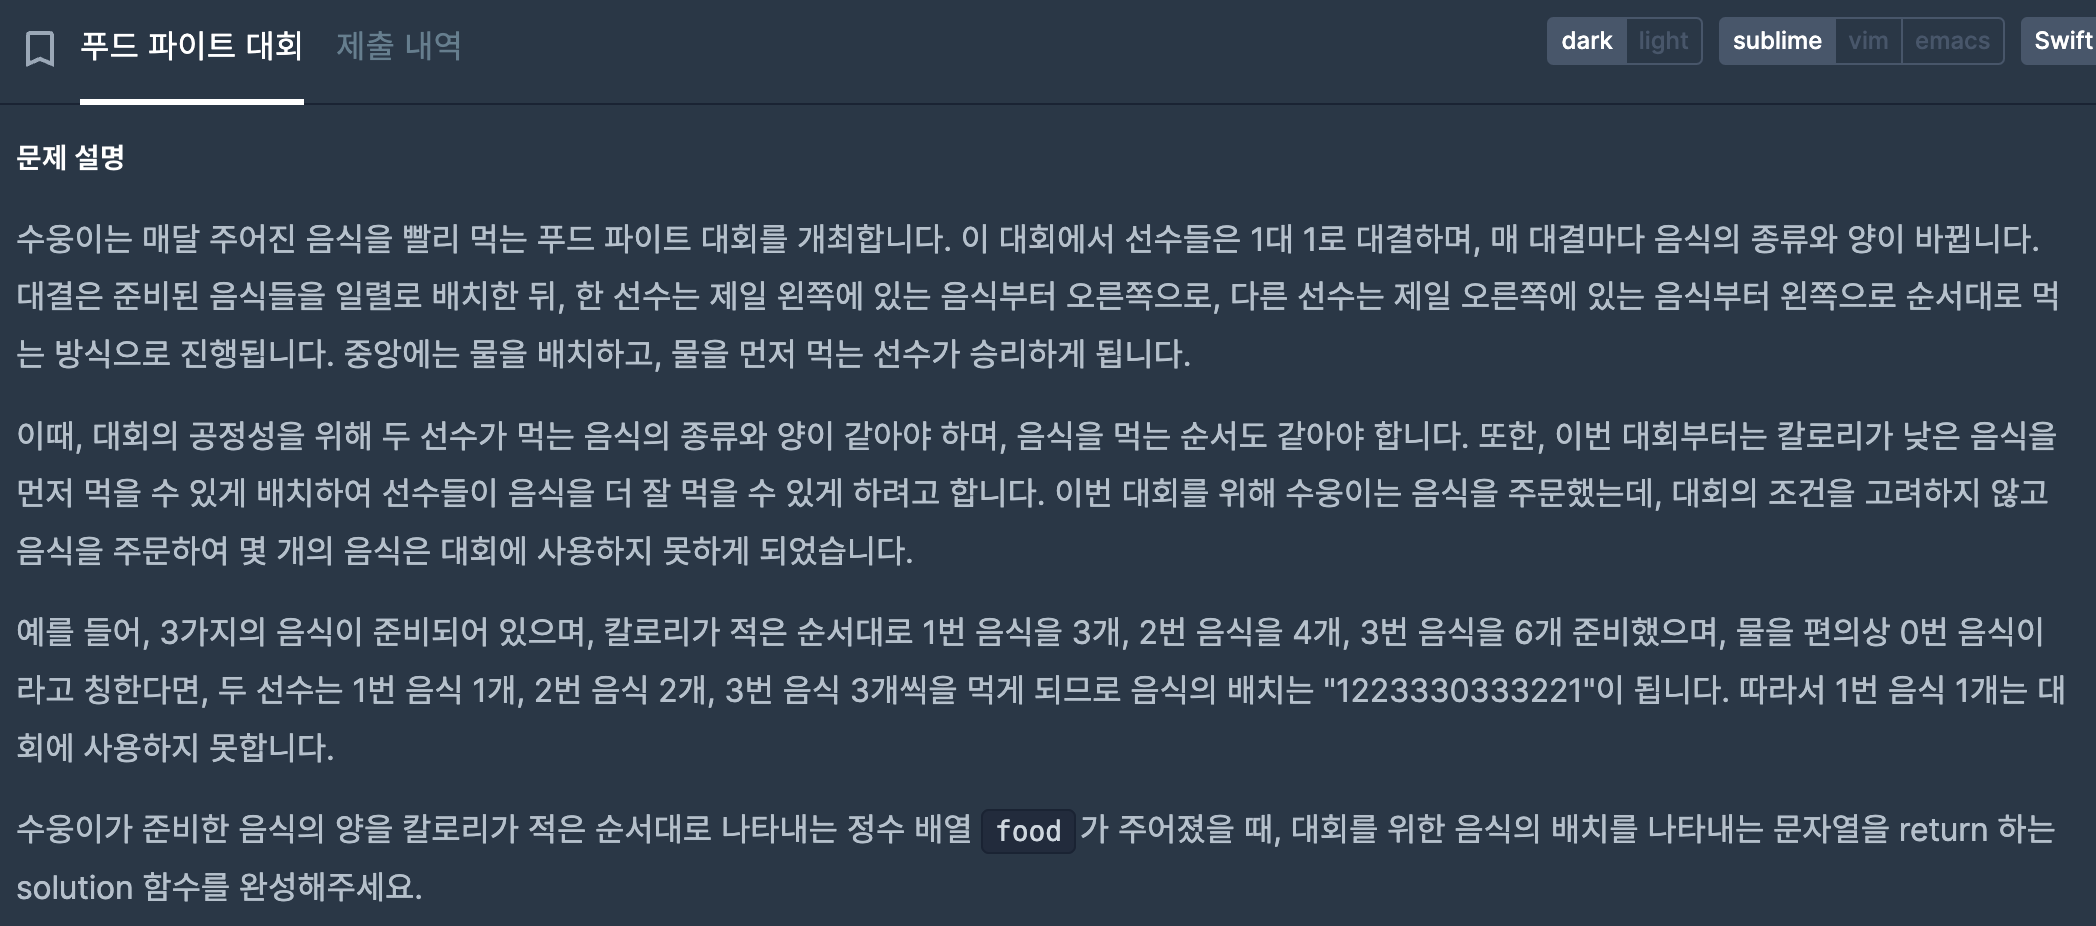
import Foundation

func solution(_ food:[Int]) -> String {
    var pArr:[Int] = [1]
    var result:[Int] = []
    var num:Int = 0

    for i in 1 ..< food.count {
        if food[i] >= 2 {
            num = food[i]/2
            for j in 1...num { result.append(i) }
        }
    }
    pArr = result.sorted(by: >)
    result.append(0)
    result = result + pArr

    return String(result.reduce(0, { $0 * 10 + $1 }))
}

solution([1,7,1,2])
이렇게 배열로 저장하는 방식을 사용했는데, 코드 실행은 잘 되다가
| 실패 (signal: illegal instruction (core dumped)) |
테스트에서 실패가 떴다... ㅠㅠ 왜지
import Foundation

func solution(_ food:[Int]) -> String {
    var result:String = ""
    var result2:String = ""
    var num:Int = 0

    for i in 1 ..< food.count {
        if food[i] >= 2 {
            num = food[i]/2
            for j in 1...num { result += String(i) }
        }
    }
    result2 = result + "0" + result.sorted(by: >)

    return result2
}
그래서 배열 사용 안 해주고, 문자열 타입으로 하니까 됐음.. 왜 안 됐던 거지..
52. 콜라 문제


문제가 너무 길다..
우선 ( n / a ) * b를 계속해주면 되겠네 간단하게 생각했는데
나머지 병까지 생각해줘야 하는 문제였다 그래서 이렇게 풀이함
import Foundation

func solution(_ a:Int, _ b:Int, _ n:Int) -> Int {
    var nResult:Int = n
    var cnt:Int = 0

    while nResult >= a {
        cnt = cnt + ( nResult / a ) * b
        nResult = nResult - (nResult / a * a) + ((nResult / a) * b)
        //즉, (갖고 있는 병) - (마트에 줄 병) + (받을 병)
    }
    return cnt
}
근데 테스트 결과 몇 개는 시간초과 나서 안되길래ㅜ 다른 사람들은 어떻게 풀었는지 찾아봤다.
import Foundation

func solution(_ a:Int, _ b:Int, _ n:Int) -> Int {
    var nowHaveBottle = n
    var result = 0

    while  a <= nowHaveBottle{
        result = result + ((nowHaveBottle / a) * b)
        nowHaveBottle = ((nowHaveBottle / a) * b) + (nowHaveBottle % a)

    }
    return result
}
오 확실히 다른 코드를 보니까 이 방법이 더 빠르겠다는 생각이 들었다..
아이고 두야.. 이렇게 간단한 문제도 빨리 해결 못하는 나 자신이 바보 같다.. 요즘은 코드 줄이기도 잘 못하고,,
풀어내는 게 고작이다 허허..
오늘은 과제를 진행하면서 알게 된 기능들을 좀 더 자세하게 정리하고, 공부하려고 함
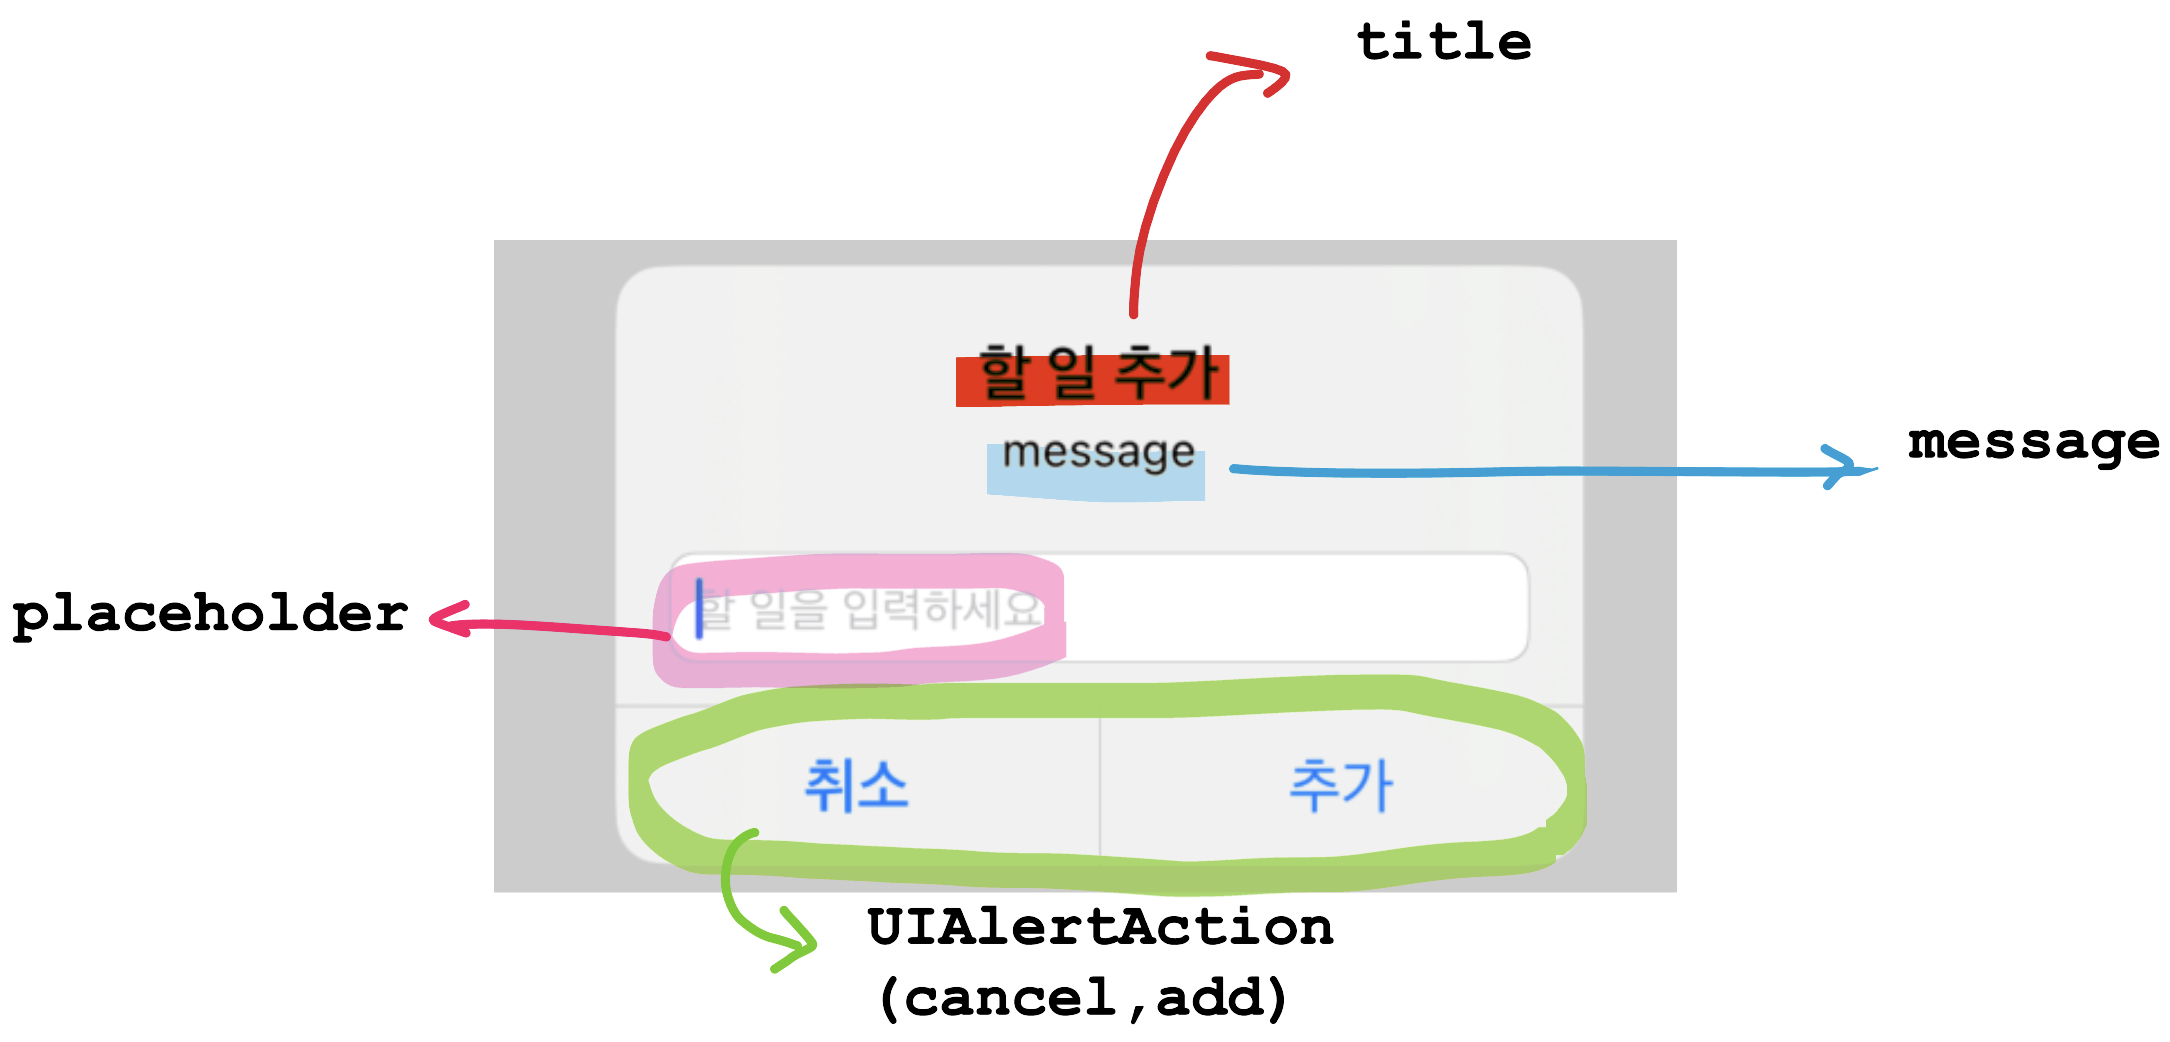
UIAlertController을 통한 추가하기 버튼 기능
@IBAction func alertTodo(_ sender: Any) {
        let title = "할 일 추가"
        let message = ""
        let alert = UIAlertController(title: title, message: message, preferredStyle: .alert)
        let cancel = UIAlertAction(title: "취소", style: .cancel)
        let add = UIAlertAction(title: "추가", style: .default) {_ in
            //추가를 눌렀을 때 일어나는 내용
            if let TodoTitle = alert.textFields?[0] {
                if TodoTitle.text?.isEmpty != true {
                    self.titles.append(Todo(id: 1, title: TodoTitle.text!, isCompleted: false))
                    self.tableView.insertRows(at: [IndexPath(row: self.titles.count-1, section: 0)], with: .bottom )
                } else {
                    print("입력된 값이 없습니다.")
                }
            }
        }
        alert.addAction(cancel)
        alert.addAction(add)

        self.present(alert, animated: true)

        //텍스트 필드 추가
        alert.addTextField() { (textfd) in
            textfd.placeholder = "할 일을 입력하세요"
        }
    }
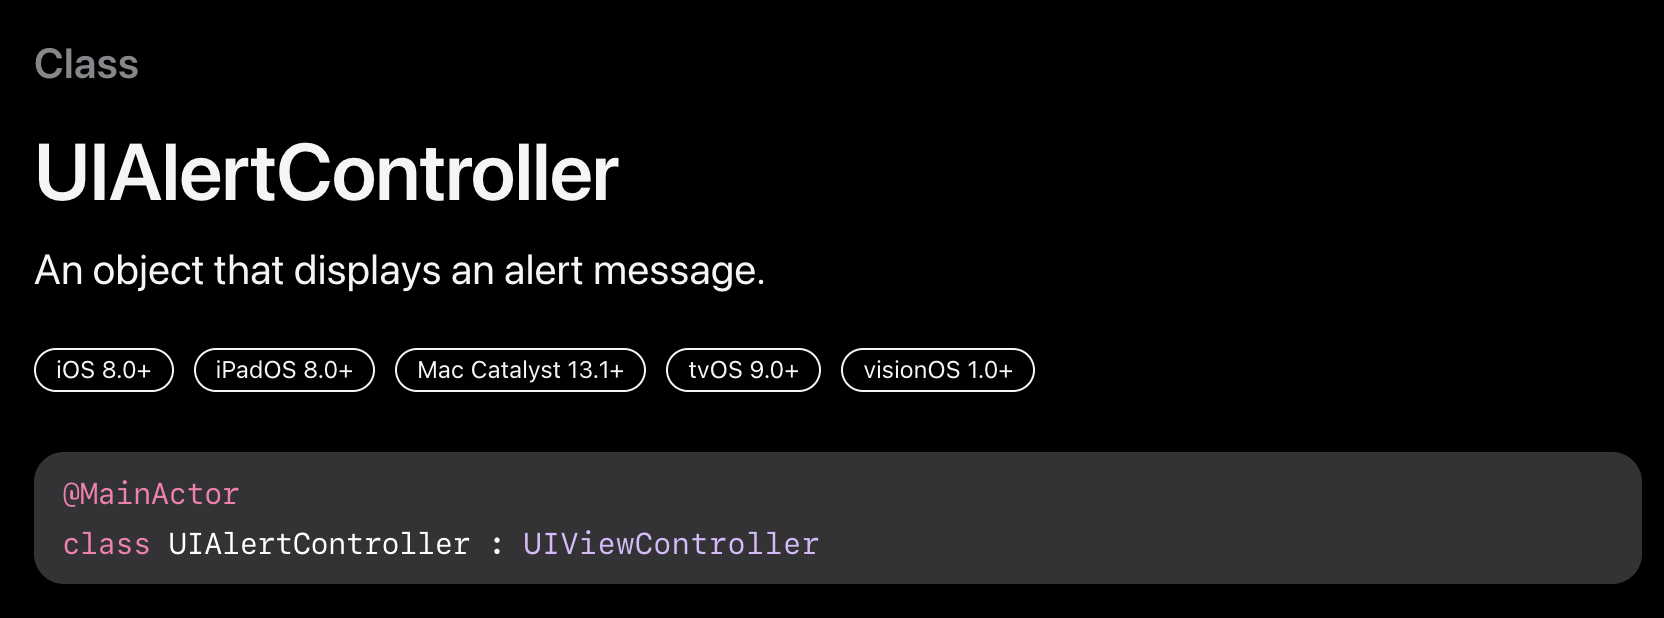
UIAlertController
: An object that displays an alert message. (경고 메시지를 표시)
인스턴스 생성
let alert = UIAlertController(title: title, message: message, preferredStyle: .alert)
* preferredStyle : .actionSheet / .alert (참고사이트)
actionSheet : 밑에서 올라오는 형식
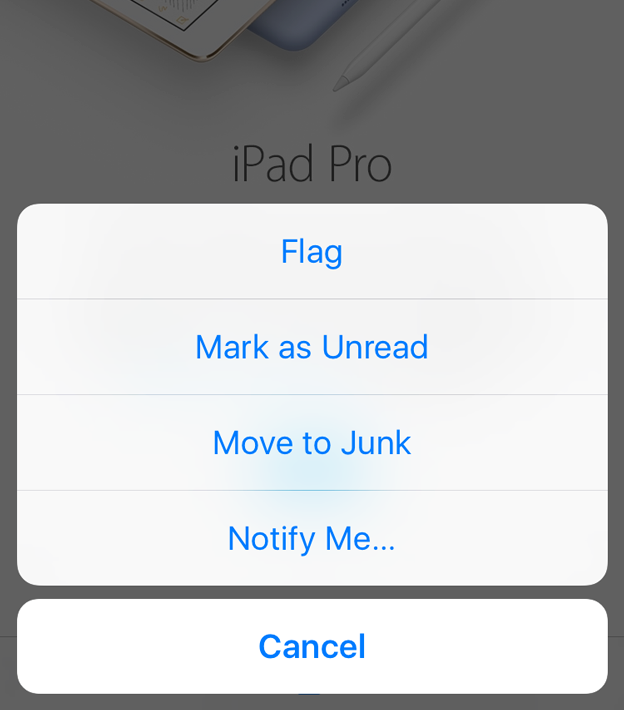
alert: 흔히 아는 경고창처럼 나온다.
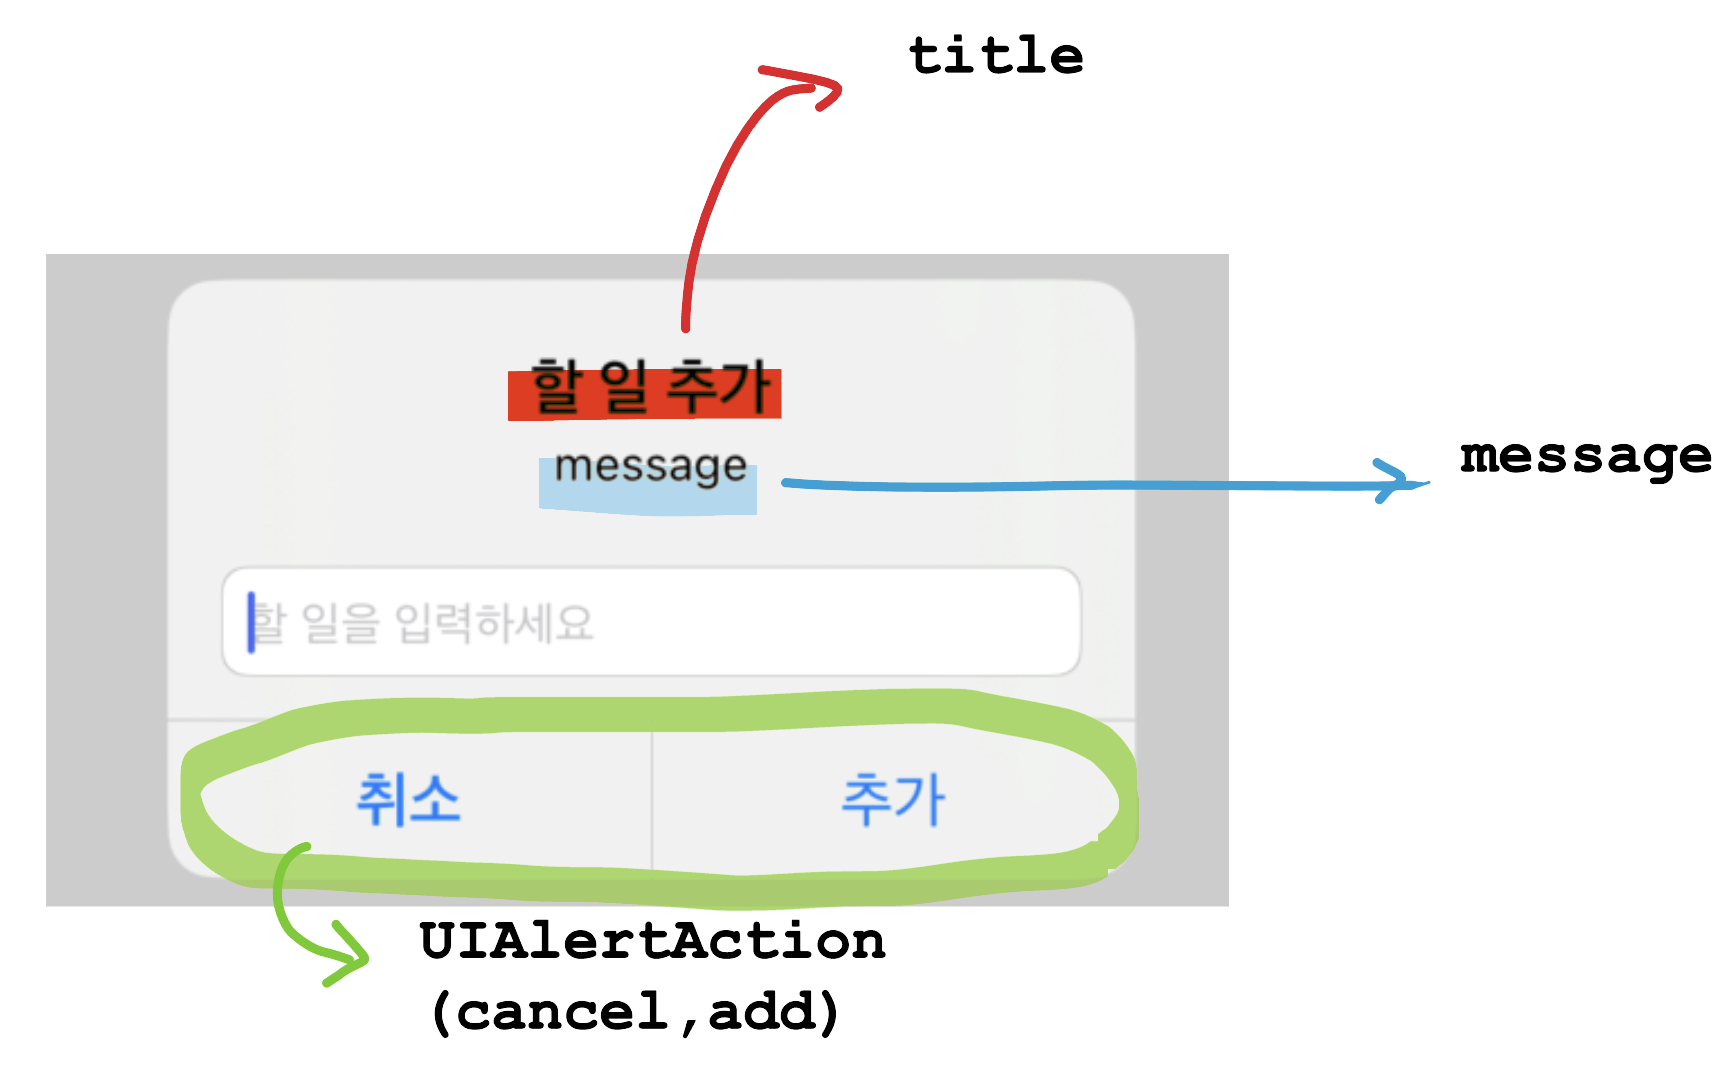
UIAlertAction
let cancel = UIAlertAction(title: "취소", style: .cancel)
let add = UIAlertAction(title: "추가", style: .default)
* style : .default(기본 스타일 적용)
.cancel(작업을 취소하고 변경되지 않은 상태로 유지)
.destructive (데이터를 변경하거나 삭제할 수 있음)
이 UIAlertAction 은 UIAlertController에 연결해 줘야 사용할 수 있다!
alert.addAction(cancel)
alert.addAction(add)
이렇게 연결해 주면 됨
그리고 present()에 UIAlertController에 객체인 alert를 넣으면
view에 뜨게 할 수 있다. UIAlertController을 사용하기 위해서 필수!
self.present(alert, animated: true)
추가 버튼을 누르면 셀이 추가되도록 설정했는데,
셀 추가 시 테이블 뷰를 업데이트해주어야 새로운 셀이 정상적으로 추가된 것을 확인할 수 있음!
테이블 셀을 업데이트하는 방법은 여러 가지가 있다. (참고사이트)
InsertRows(at: with: )
: 삽입에 애니메이션을 적용하는 옵션을 사용하여 인덱스 경로 배열이 식별하는 위치에 테이블 뷰에 행을 삽입
self.tableView.insertRows(at: [IndexPath(row: self.titles.count-1, section: 0)], with: .bottom )
* at: 은 어디에 업데이트할 것인지
with: 는 어떻게 업데이트 할 것인지 즉, 애니메이션 효과? 와 같은 개념인 것 같음 (예를 들어. right로 지정하면 오른쪽에서 셀이 나온다)
deleteRows(at: with: )
: 삭제에 애니메이션을 적용하는 옵션을 사용하여 인덱스 경로 배열이 식별하는 행을 삭제
그 외에도 MoveRow(at: to: ), insertSection(_: with: ), deleteSections(_: with: ), moveSection(_: toSection: )가 있음
reloadData()
: 테이블 뷰의 행과 섹션을 다시 로드해 주는 메서드. 즉, 변경된 셀뿐만 아니라 기존 셀도 전부 업데이트시켜줌
* 행을 삽입하거나 삭제하는 메서드, 특히 및 호출로 구현된 애니메이션 블록 내에서 호출하면 안 됩니다.
그 외에도 테이블 뷰를 reload 하는 다양한 방법이 있음

텍스트 필드 추가
UIController 객체인 alert.addTextField()를 해주면 텍스트 필드를 추가할 수 있다.
alert.addTextField() { (textfd) in
textfd.placeholder = "할 일을 입력하세요"
}
* placeholder을 감싸고 있는 부분이 textfield
Protocol
: 해당 기능에 필요한 요구 사항을 선언해 두는 것. 미리 약속해 놓는 것?이다. 그리고 이 약속된 프로토콜을 클래스, 구조체, 열거형이 채택하여 사용할 수 있게 한다. (참조, 여기 사이트에 굉장히 잘 정리해 주심)
이번에 스위치의 상태를 저장하면서 protocol 기능을 사용했었는데,
//myTableViewCell.swift

protocol SwitchOnDelegate {
    func switchChange(index:Int, switchIs: Bool)
}
//myTableViewCell.swift

    @IBOutlet weak var myLabel: UILabel!
    @IBOutlet weak var mySwitch: UISwitch!

    var switchOnDelegate: SwitchOnDelegate?
    var orderCellIndex:Int = 0

    //스위치 Action 시 취소선
    @IBAction func completeTodo(_ sender: UISwitch) {
        changeStrikeThrough()
    }

    func changeStrikeThrough() {
        if mySwitch.isOn {
            myLabel.attributedText = myLabel.text?.strikeThrough()
            switchOnDelegate?.switchChange(index: orderCellIndex, switchIs: true)
        } else {
            switchOnDelegate?.switchChange(index: orderCellIndex, switchIs: false)
            myLabel.attributedText = myLabel.text?.removestrikeThrough()
        }
    }
myTableViewCell에서 SwitchOnDelegate 프로토콜을 생성해 주고, 스위치 변동에 따라서 index와 값을 orderCellIndex와 switchIs에 저장해 준다. (var switchOnDelegate: SwitchOnDelegate? 인스턴스 생성해서 사용)
class ViewController: UIViewController, UITableViewDelegate,
			UITableViewDataSource, SwitchOnDelegate {
이렇게 클래스에 SwitchOnDelegate 프로토콜을 입력해 줘서 채택해서 사용할 수 있음
class ViewController: UIViewController, UITableViewDelegate, UITableViewDataSource, SwitchOnDelegate {

    //데이터 구조체 생성
    struct Todo {
        var id:Int
        var title:String
        var isCompleted:Bool
    }

    var titles:[Todo] = [
        Todo(id: 1, title: "title1", isCompleted: false),
        Todo(id: 1, title: "title2", isCompleted: false),
        Todo(id: 1, title: "title3", isCompleted: false)
    ]

    // 스위치 상태 저장
    func switchChange(index: Int, switchIs: Bool) {
        titles[index].isCompleted = switchIs
    }
프로토콜에 약속했던 내용을 이 클래스에 사용.
titles 배열에 따른 index와 switchIs 상태를 연결해서 저장할 수 있게 하는데 프로토콜을 사용했음.
(취소선도 상태를 변수로 만들어서 프로토콜로 저장해 줬으면 오류가 안 났을까..?)
여하튼 프로토콜을 이런 식으로 사용할 수 있구나 생각했다.
UITableView
: 열의 행을 사용하여 데이터를 표시하는 뷰 (참조, 이 사이트에 잘 정리되어 있는 것 같음. Delegate와 DataSource까지 )
//ViewController.swift

class ViewController: UIViewController, UITableViewDelegate, UITableViewDataSource, SwitchOnDelegate {

    func tableView(_ tableView: UITableView, numberOfRowsInSection section: Int) -> Int {
        return titles.count
    }

    func tableView(_ tableView: UITableView, cellForRowAt indexPath: IndexPath) -> UITableViewCell {
            let cell = tableView.dequeueReusableCell(withIdentifier: "myCell", for: indexPath) as! myTableViewCell
            let target = titles[indexPath.row]

            cell.mySwitch.isOn = target.isCompleted
            cell.myLabel.text = target.title

            cell.orderCellIndex = indexPath.row
            cell.switchOnDelegate = self

            return cell
    }

    func tableView(_ tableView: UITableView, didSelectRowAt indexPath: IndexPath) {
        tableView.deselectRow(at: indexPath, animated: true)
    }

    //삭제 기능
    func tableView(_ tableView: UITableView, commit editingStyle: UITableViewCell.EditingStyle, forRowAt indexPath: IndexPath) {
        if editingStyle == .delete {
            titles.remove(at: indexPath.row)
            tableView.deleteRows(at: [indexPath], with: .fade)
        } else if editingStyle == .insert {

        }
    }

    override func viewDidLoad() {
        super.viewDidLoad()
        tableView.delegate = self
        tableView.dataSource = self
    }
}
이건 내가 TodoList 과제를 하면서 작성한 코드이다.
테이블뷰의 필수 입력 함수
func tableView(_ tableView: UITableView, numberOfRowsInSection section: Int) -> Int { }
: 셀의 개수를 설정하는 함수
func tableView(_ tableView: UITableView, cellForRowAt indexPath: IndexPath) -> UITableViewCell { }
: 셀의 내용을 설정하는 함수
추가 기능
func tableView(_ tableView: UITableView, didSelectRowAt indexPath: IndexPath) { }
: 행이 선택되었음을 알린다 (나는 행이 선택되었을 때, 애니메이션을 설정하기 위해 사용했음)
* UITableView에는 UITableViewDelegate와 UITableViewDataSource가 꼭 필요한데, numberOfRowsInSection과 cellForRowAt 은 UITableViewDataSource에 포함? 되고, didSelectRowAt 같은 기능들이 UITableViewDelegate를 통해 사용할 수 있는 함수인 것 같다. ( didSelectRowAt 외에도 다른 다양한 기능이 있을 것이다 아마 )
override func viewDidLoad() {
    super.viewDidLoad()
    tableView.delegate = self
    tableView.dataSource = self
}
그리고 사용하기 위해서는 이렇게 할당해 주는? 작업이 필요하다.
뭔가 계속 오류 잡고, 이것저것 해보느라 그냥 넘어간 부분도 많았는데
오늘 하나하나 공부하면서 다시 생각해 보게 되고, 알아갈 수 있어서 좋았던 것 같다!
다음 주부터는 팀 프로젝트에 들어가는데 걱정이 이만저만이 아니구먼..ㅠ
팀에 피해가 안 가도록,, 주말 동안더 공부를 해야겠다.. ㅠ (진짜..?)